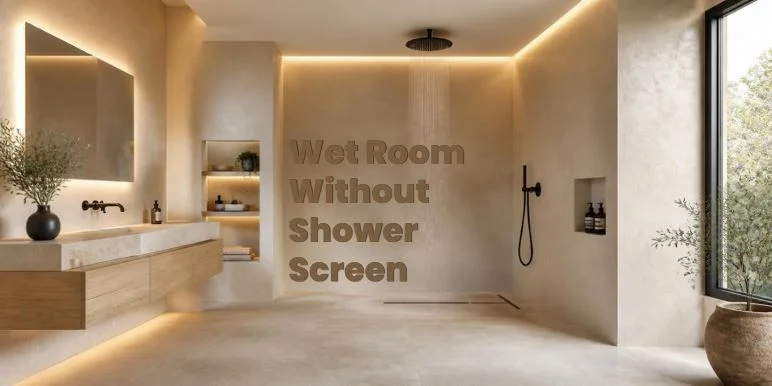
If you’ve been scrolling design boards lately, you’ve probably noticed a quiet rebellion against glass shower screens. More homeowners are choosing a wet room without shower screen—an open, fully tanked bathroom where the entire floor is waterproofed and water flows to a central drain. No panel to squeegee, no hinges to clean, no glass to streak. Just one continuous, spa-like space.
It sounds effortless. It isn’t — not without the right planning. Get the slope, drainage, or waterproofing wrong and you’re not looking at a sleek open bathroom; you’re looking at a flooded hallway and a very expensive repair bill. This guide walks you through exactly what a screen-free wet room actually requires to work, room by room, decision by decision.
The Real Problem: Water Goes Where You Didn’t Plan For It
Here’s the pain point nobody mentions in the glossy before-and-afters: removing the shower screen doesn’t remove the water — it just removes the barrier that used to contain it. Without a screen, every drop of spray, splash, and runoff is now the responsibility of your floor, your walls, and your drainage system.
Homeowners who attempt a DIY version of this trend often run into the same issues:
- Water creeping into “dry” zones — soaking the vanity cabinet, the toilet paper, or seeping under the door into the hallway.
- Standing water instead of drainage — a floor that looks flat but isn’t actually sloped correctly toward the drain, leaving puddles that take hours to evaporate.
- Mold behind walls — because a single coat of “waterproof” paint was used instead of a real waterproofing membrane bathroom system.
- Cold, drafty showers — since an open layout has no glass to trap steam and heat, making winter showers noticeably less cozy without a plan for that.
The core issue is that a walk-in shower without door isn’t just “a shower with the screen taken away.” It’s a completely different waterproofing and drainage system that has to be engineered from the subfloor up. Skip that engineering, and the aesthetic you wanted becomes a maintenance nightmare.
The Ideal Solution: Build the Wet Room Correctly From the Ground Up
The good news: every one of those problems is solvable, and none of them require reinstalling a screen. It just means respecting the sequence — waterproofing, slope, drainage, then finishes.
1. Start With a Proper Waterproofing Membrane
This is non-negotiable and it’s the single biggest difference between a wet room and a standard bathroom. A true waterproofing membrane bathroom setup wraps the entire wet zone floor and lower walls (typically up to 1.8–2m high) in a continuous, sealed barrier — not just the shower area.
- Use a liquid-applied or sheet membrane system rated specifically for wet rooms (not general bathroom sealant).
- Pay special attention to corners, pipe penetrations, and the transition where floor meets wall — these are the most common failure points.
- Have the membrane inspected (a flood test, where the area is filled with water for 24 hours) before tiling begins. It’s tedious, but it’s the cheapest insurance you’ll ever buy.
2. Engineer Curbless Shower Drainage Before You Tile
Traditional bathrooms rely on a raised curb or the screen itself to keep water contained. In a screen-free wet room, that job falls entirely to the floor’s slope and the drain.
- The floor needs a gentle, consistent gradient — usually around 1:50 — falling toward a linear or point drain positioned at the lowest point of the room.
- A linear drain along one wall is often the better choice for curbless shower drainage because it creates a straighter, more predictable fall line than a central point drain, and it hides more discreetly under a tile-insert cover.
- Don’t eyeball the slope. This is a job for a professional with a laser level — a floor that’s off by even a few millimeters will pool water instead of clearing it.
3. Zone the Room Without Adding a Physical Barrier
You can define a wet zone and a dry zone visually and functionally without glass.
- Change the floor level slightly, or use a subtle material shift (like a different tile size or a stone threshold strip) to signal “this is where the water lives” without blocking it.
- Angle the showerhead away from the dry zone — a rain shower mounted centrally over the drain splashes far less than an angled wall-mounted head.
- Use a half-height partition wall if you want some containment without going back to full glass. It breaks sightlines to spray without recreating the screen you were trying to avoid.
4. Solve for Heat and Privacy Separately
Since you’re losing the screen’s steam-trapping and privacy functions, address these directly:
- Install underfloor heating in the wet zone — it keeps the tile warm and helps residual water evaporate faster, reducing standing moisture.
- Add a high-output extractor fan rated for the room’s full square footage, not just the old “shower stall” footprint.
- If privacy is a concern (shared bathrooms, guest use), a frosted or fluted glass window, rather than a shower screen, keeps the open layout while solving sightlines.
Conclusion
A wet room without shower screen can absolutely deliver the seamless, hotel-spa look you’re after — but only when the waterproofing membrane, the slope, and the curbless shower drainage are treated as the actual design, not an afterthought to the aesthetic. Get those three fundamentals right, and everything else — the tile choice, the fittings, the zoning — is just the fun part.
Planning your own screen-free bathroom renovation? Browse our full collection of wet room layouts and drainage solutions to find the setup that fits your space.